Play Training
Confirm Final Sold Order Details
Number of Guide Steps: 7
The Final Sold Order Details form in Vision VX acts as a comprehensive communication tool, facilitating the seamless conveyance of critical order information to the Lee Central Sales Enablement teams.
This meticulous process involves configuring print run dates, specifying creative requirements, and detailing specific fulfillment intricacies, especially for Owned and Operated (O&O) products.

- 1. Open Final Sold Order Details
- 2. Set Print Run Dates and Creative Methods
- 3. Set O&O Creative Methods
- 4. Set Amplified Creative Methods
- 5. Add Additional Creative
- 6. Save Changes
- 7. Confirm as Final
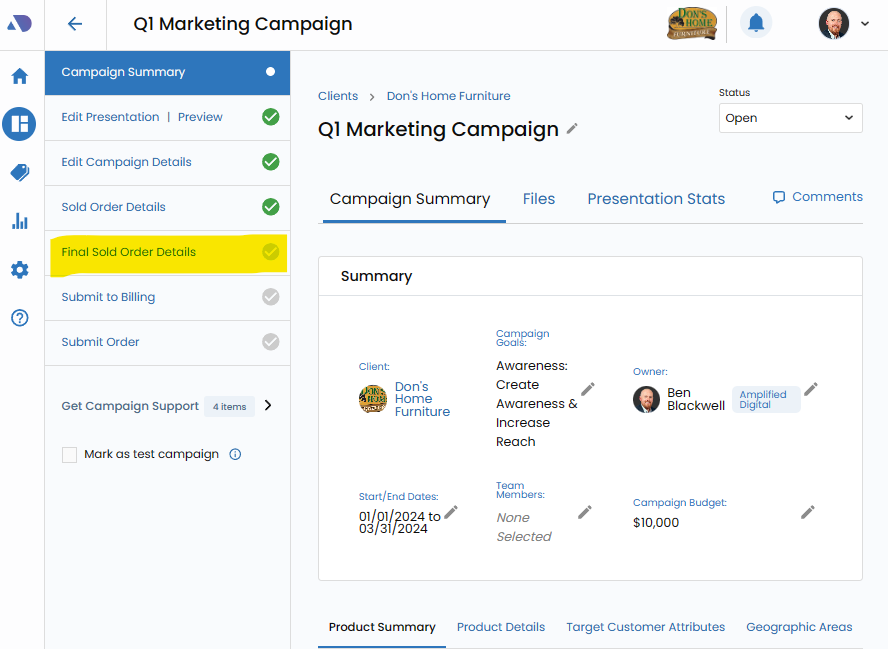
Open Final Sold Order Details.
Initiate the process by accessing the Final Sold Order Details form. This serves as the central hub for communicating conclusive order details to the Lee Central Sales Enablement teams

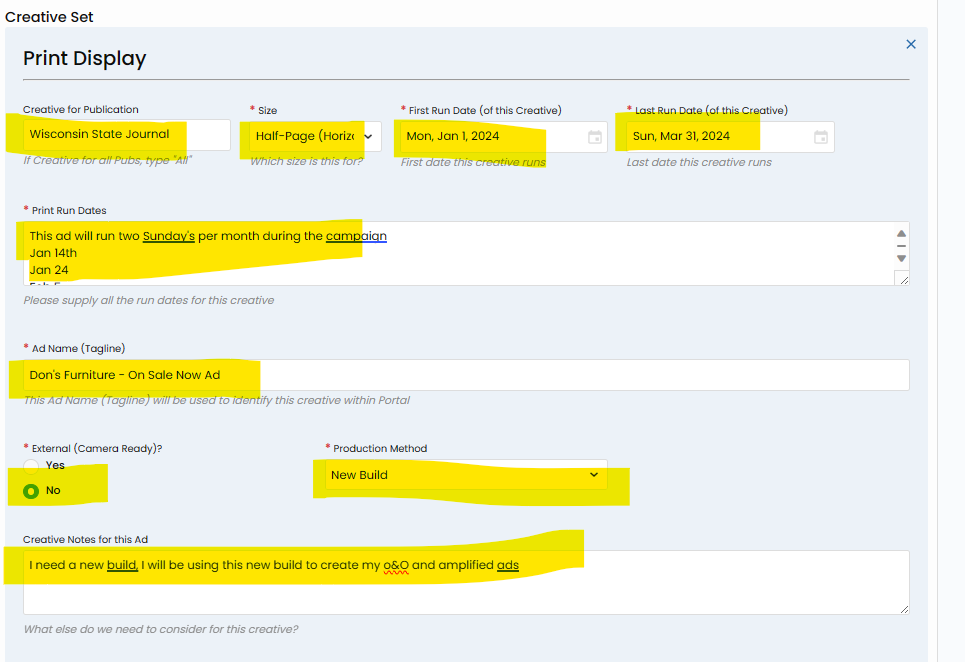
Set Print Run Dates and Creative Methods.
For print-related information, configure each print size within every sold publication.
Specify essential details such as publication, size, first run rate, last run date, specific run dates, creative name (tagline for portal), production method, pick-up number or pick-up request, and creative notes.

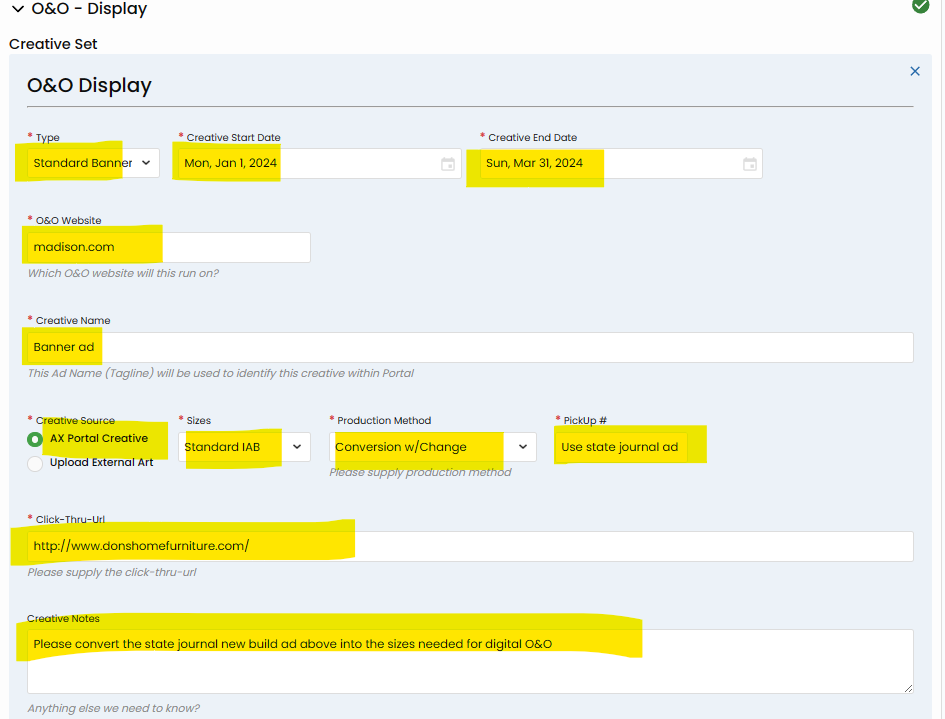
Set O&O Creative Methods.
Detail creative requirements for Owned and Operated products.
Specify information such as the O&O website, size, creative start date, creative end date, specific run dates, creative name, production method, pick-up number or pick-up request, click-thru URL, and creative notes.

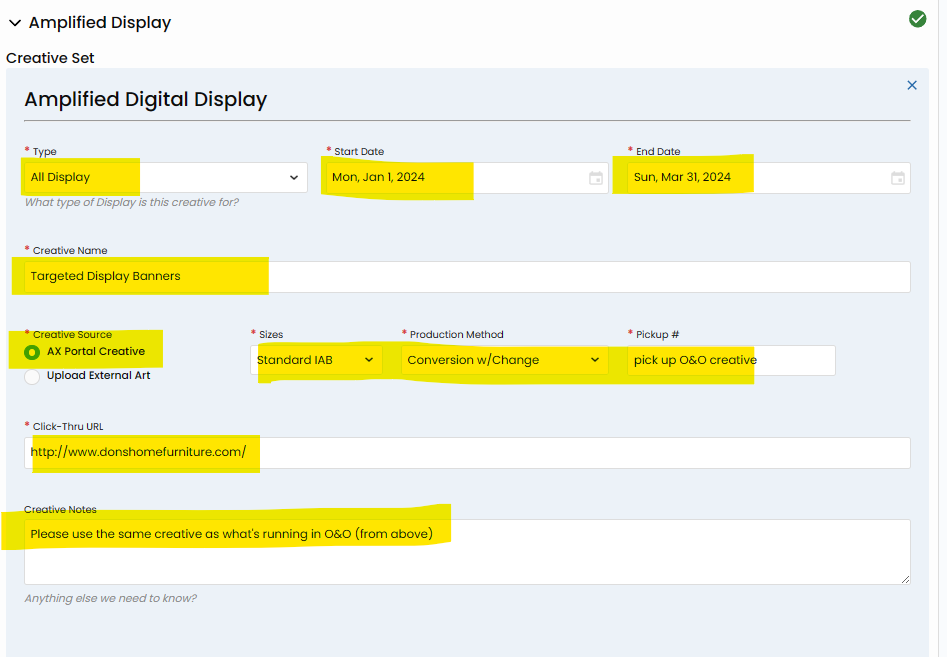
Set Amplified Creative Methods.
For Amplified products, outline creative requirements.
These include type, size, creative start date, creative end date, specific run dates, creative name, production method, pick-up number or pick-up request, click-thru URL, and creative notes.

Add Additional Creative.
Enhance flexibility by incorporating additional creative elements. Use the "Add New Row" button to seamlessly include extra creative details within any set—be it for print, Owned and Operated, or Amplified products.


Save Changes.
Save your changes to the Final Sold Order details before proceeding to Confirm as Final.


Confirm as Final.
To finalize the form, click Confirm as Final. You will not be able to make edits after this step, so ensure that you have all details covered.